 |
 |
 |
 |


Follow The InnKeeper on:


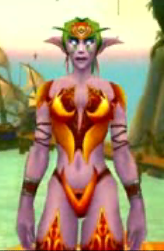
Evil Fire Elf
|
|
||||||||||||||||||||||||||||||
|
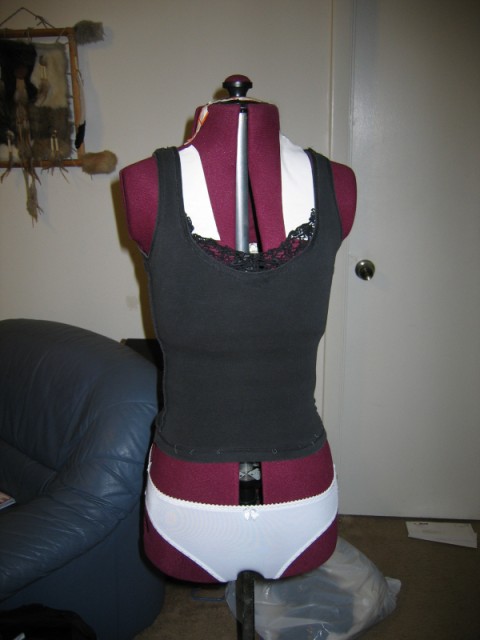
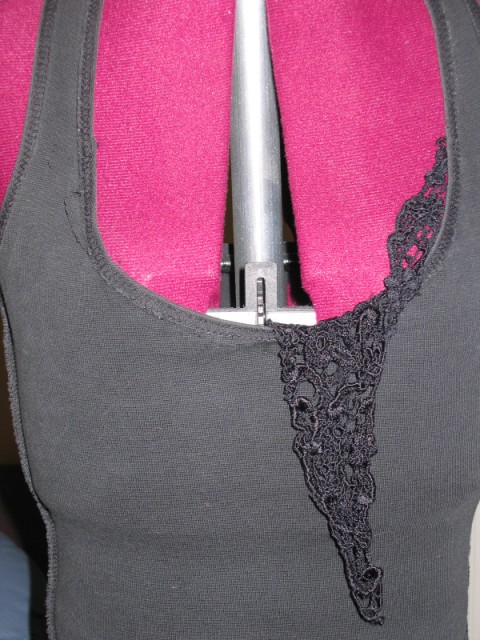
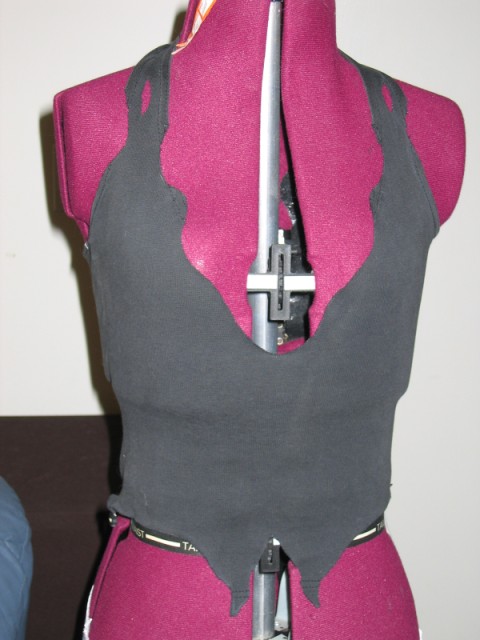
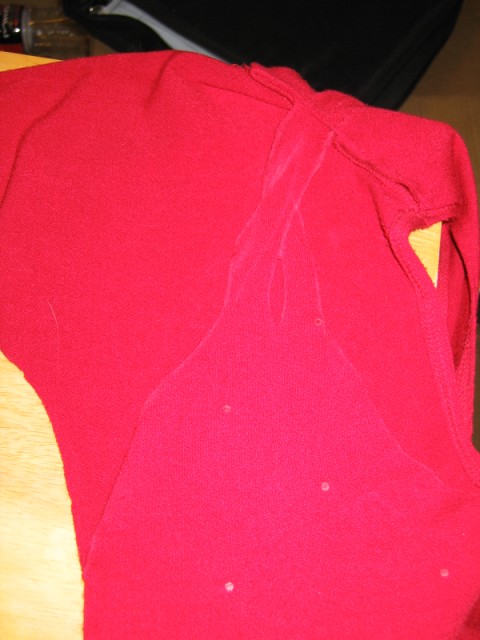
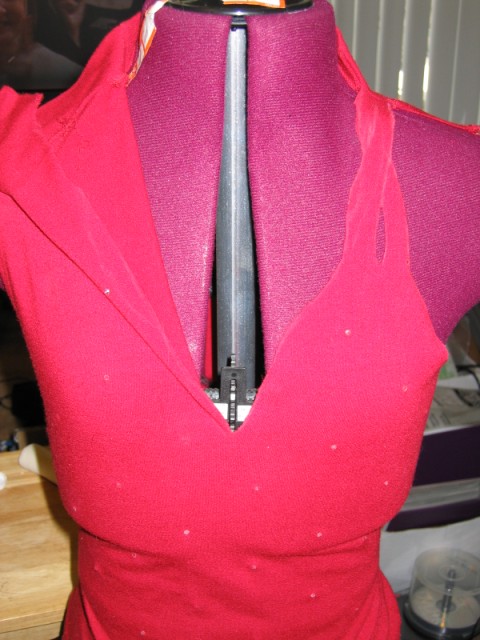
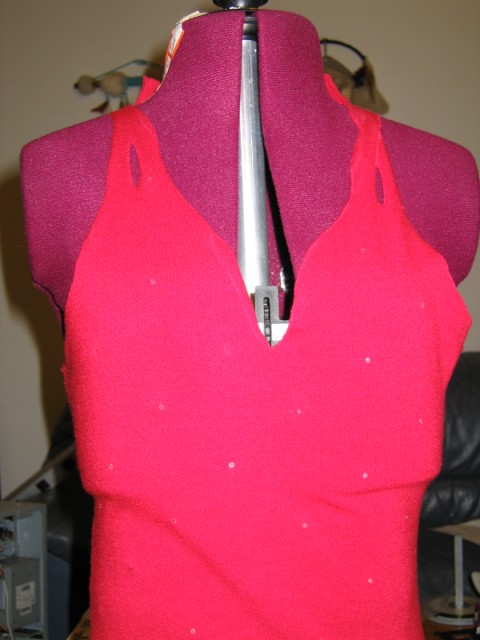
So, how does one go about becoming a Fire Elf? I tried several attempts before finding the method that worked best for what I wanted. First, I drew upon my experience as The Baroness and decided my Fire Elf would wear latex. I cut up a tank top into the shape I wanted for my halter top, but it didn't work so well. Because the tank top already had such a low, wide neckline, I couldn't get the right V-neck shape and it just opened too wide.
|
||||||||||||||||||||||||||||||
|
|
||||||||||||||||||||||||||||||
|
When tested, this particular theory held true.
|
||||||||||||||||||||||||||||||
|
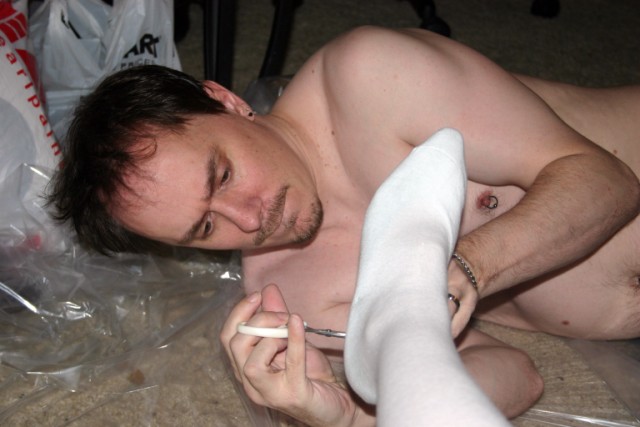
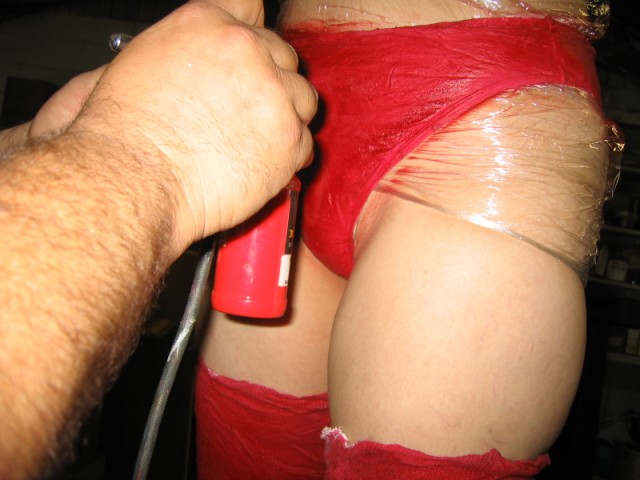
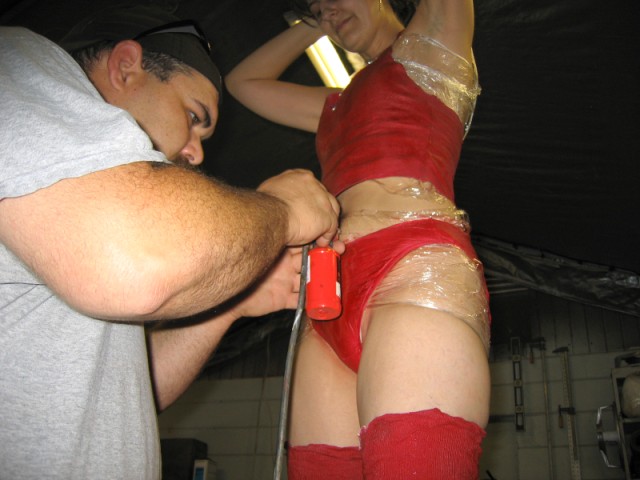
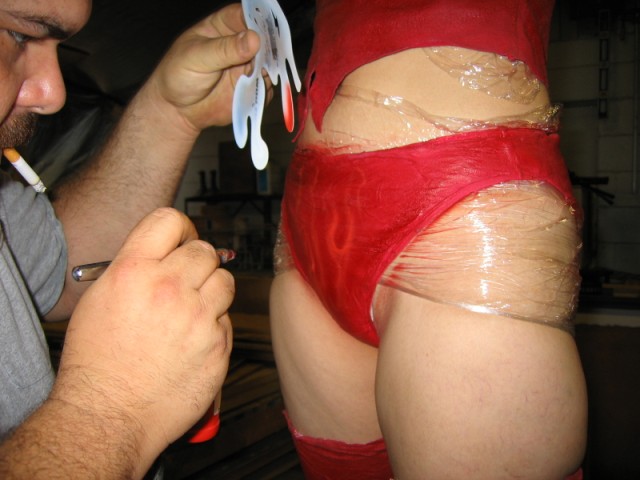
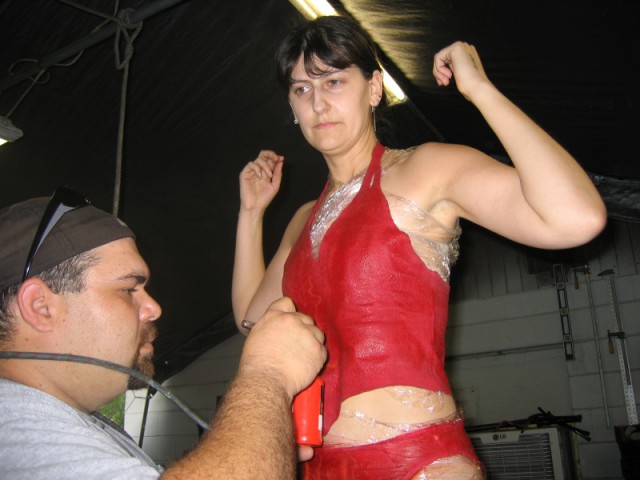
Public Service Announcement: Don't forget to put plastic down on the ground, work in a well-ventilated area (the latex fumes will knock you unconscious!), and wrap the body up in Saran Wrap everywhere you plan to paint the latex, underneath the fabric that will be painted on. It hurts like a bitch to pull latex off the skin!
|
||||||||||||||||||||||||||||||
|
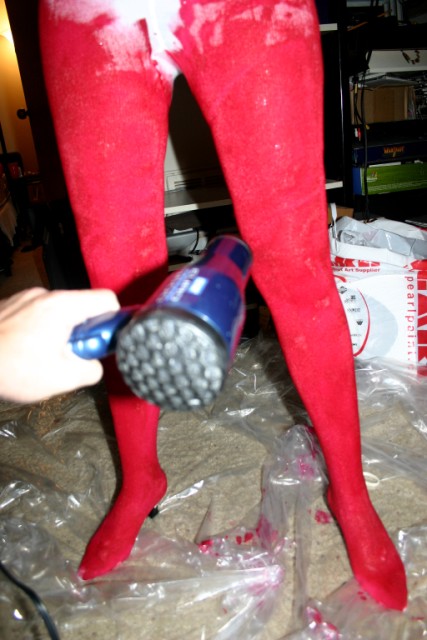
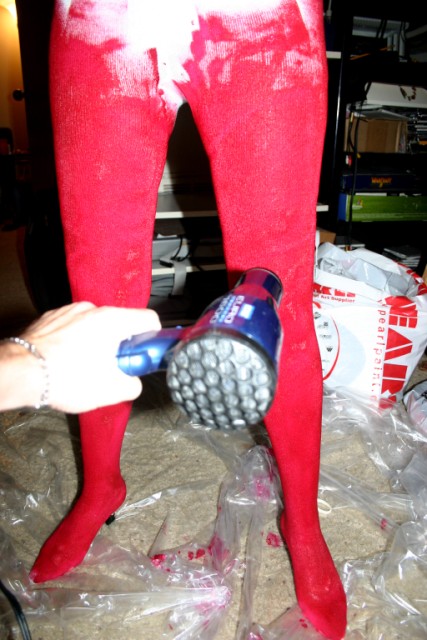
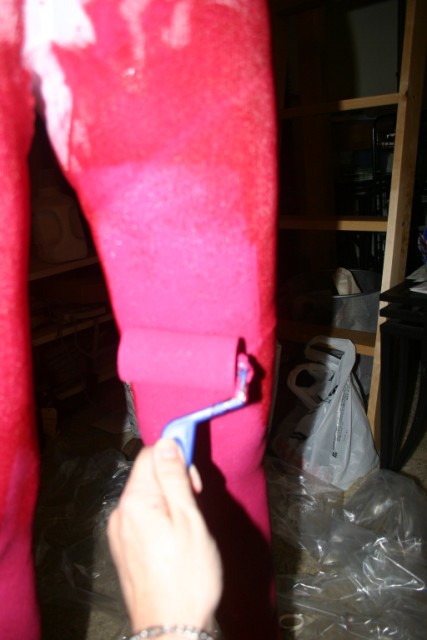
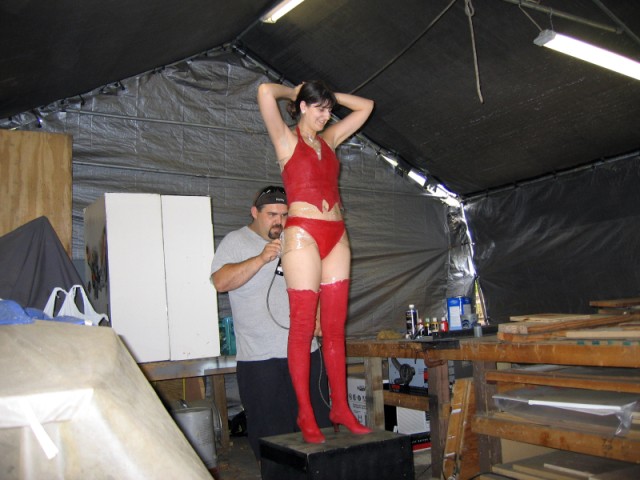
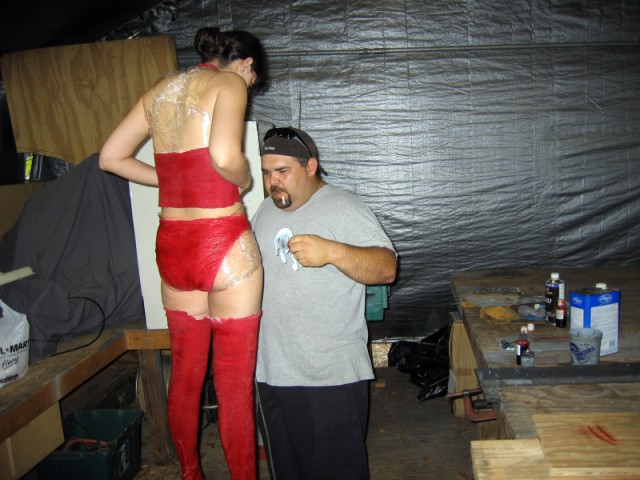
Using a hair dryer significantly decreases the amount of time it takes the latex to "cure" or dry between coats and at the end. Make sure you have one handy! We ended up painting several coats to get a good, thick, rubbery coverage. Unlike the Baroness, the different color base-fabric made it much easier to see missed spots that we could touch up on successive coats.
|
||||||||||||||||||||||||||||||
|
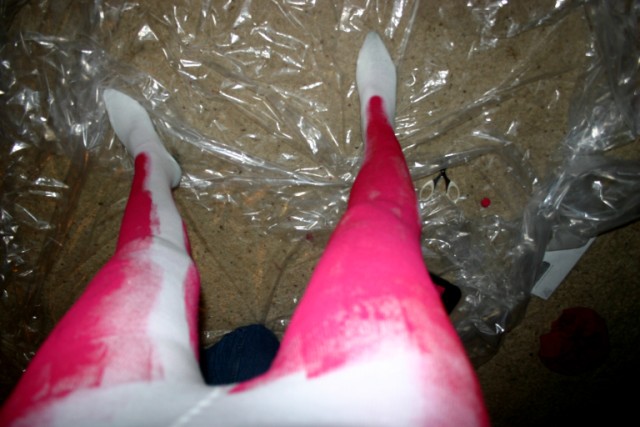
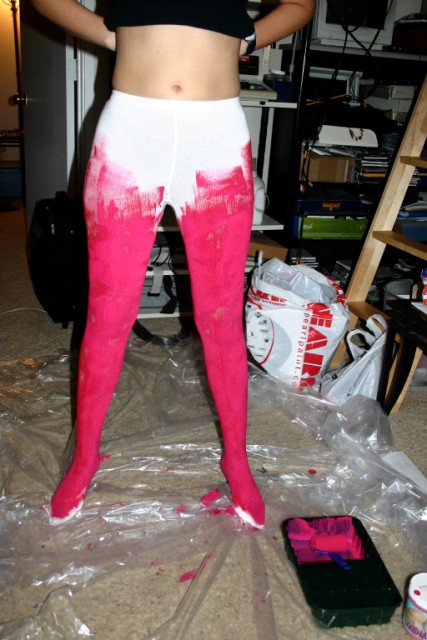
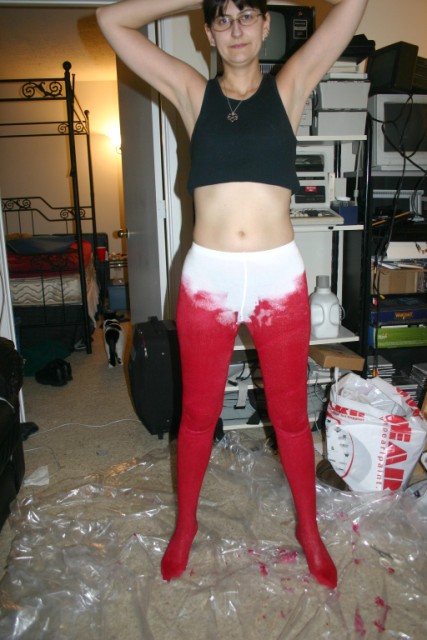
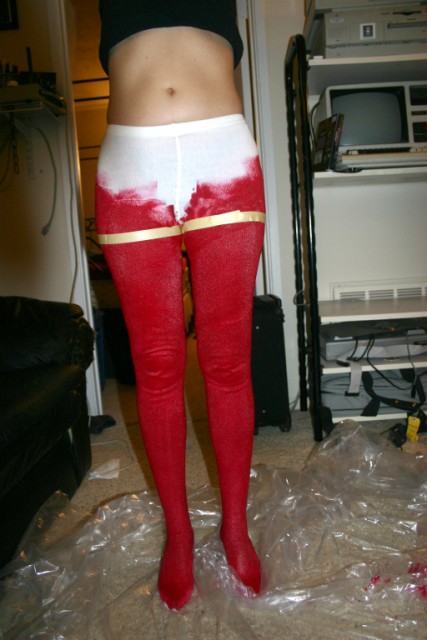
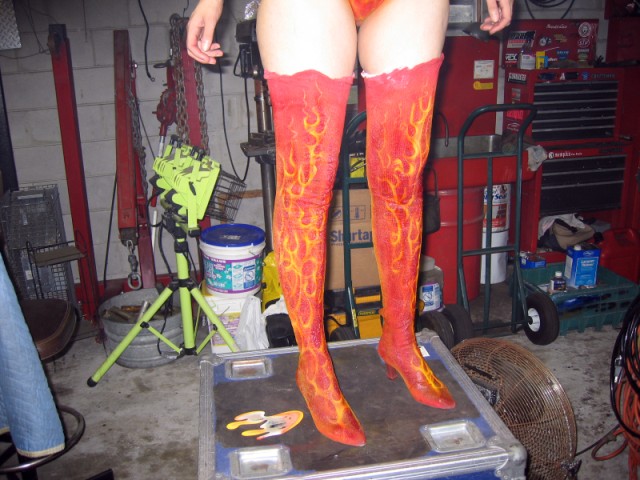
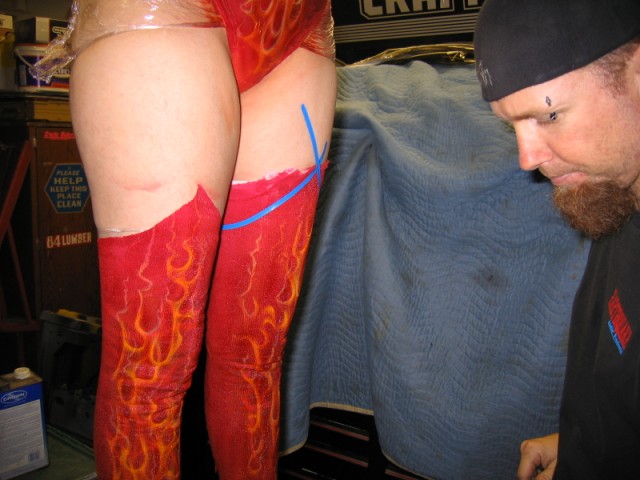
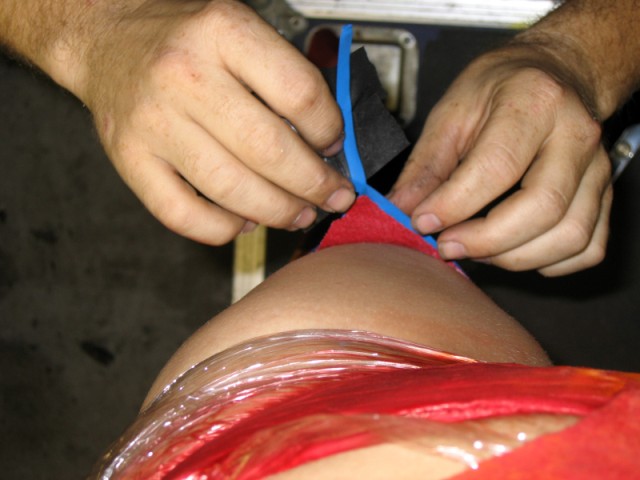
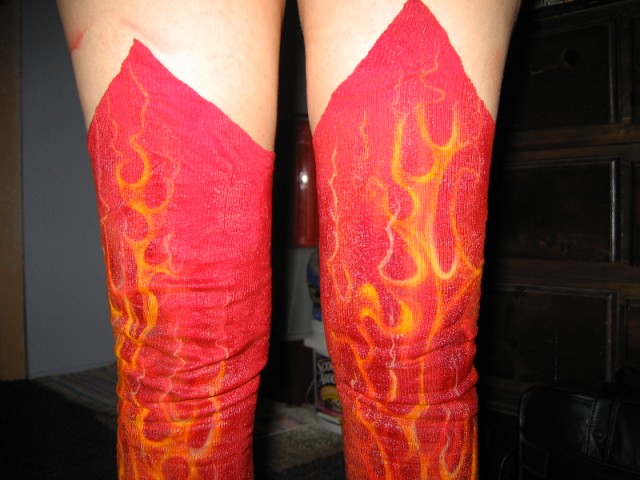
I didn't bother painting past the legs because I planned to cut these tights into thigh-highs. Tacit painted higher than we estimated I would eventually cut. Then we used masking tape to mark off even cut marks and Tacit seperated the leggings from the rest of the tights. I intentionally left the edges unfinished because I planned to cut them after the design was added later. It was decided that cutting after latexing would help the clothing keep its shape better. After the final cutting (below), the shape held up much better being cut post-latex than those parts of the top cut pre-latex. The pre-cutting had a tendency to curl in the narrow parts, like at points.
|
||||||||||||||||||||||||||||||
|
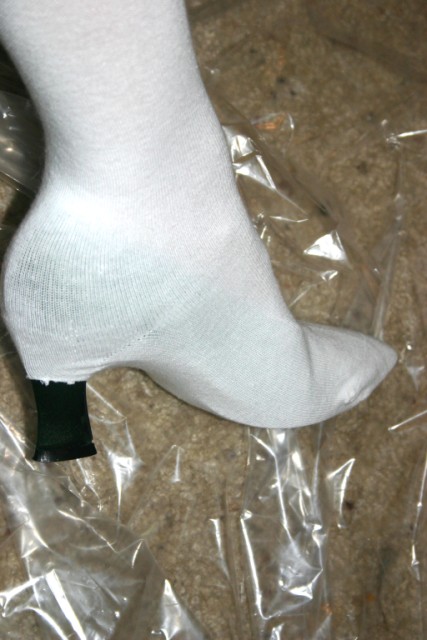
I strongly advise against using cotton tights for the same issues I had with the top. Latex takes on a rubbery-version of the properties of the fabric to which it bonds. In other words, the cotton tights were a lot like socks, with ribbing. Not something you really notice in cotton fabric, but once rubberized, you can see the ribbing very well. The best solution would have been to use spandex tights, but they seemed to have disappeared with the '80s. They might still exist in dance catalogues, but I didn't find them and I also didn't want to spend a lot of money for something I planned to cut up and paint with latex ... especially if it didn't work and I had to try another method. Since I now know that the spandex found in dance leotards is the perfect material for latexing clothing, I recommend only using clothing and fabric made of that spandex material. Other makers of latex clothing also recommend totally non-stretchy fabrics like denim (such as making latex pants), but I haven't tried it yet. However the tights-over-heels method did create a pair of custom latex boots that fit only my feet and legs. Another problem I discovered was getting the boots on and off. They fit so closely to my own legs that I couldn't get my heel out past the ankle (I have very small ankles). After much tugging and swearing, tacit and I finally got them off. I then had to spend the next 2 hours unsticking the latex from itself because I didn't have any silicon lube to prevent it from sticking to itself. I recommend ID Millenium, since that was the brand the adult-store clerk recommended to me, when I researched Care And Feeding Of Latex Clothing, as the brand he used to maintain the store's latex inventory until they were sold. Eventually, I ended up putting an "invisible" red zipper in the back of the boot that started at the top of the heel of the original pump and went up to the bottom of my calf just where it starts to widen enough for my heel to pass through unaided. I hot-glued the zipper in, and I suspect I'll have to keep hot glue with me for repair the more I wear them. DO NOT REMOVE LATEX FROM BODY UNTIL IT'S CURED!!!! I just can't stress this enough. Stand there with the hair dryer until it's totally dry and not tacky to the touch. Then stand there some more. Then wait until your feet go numb and your back aches. Then stand there another hour. If you start the latexing job on Friday after work, you should not remove the latex from the body until you are starting to get concerned that you will be late to work Monday morning. I'm not kidding ... wait! |
||||||||||||||||||||||||||||||
|
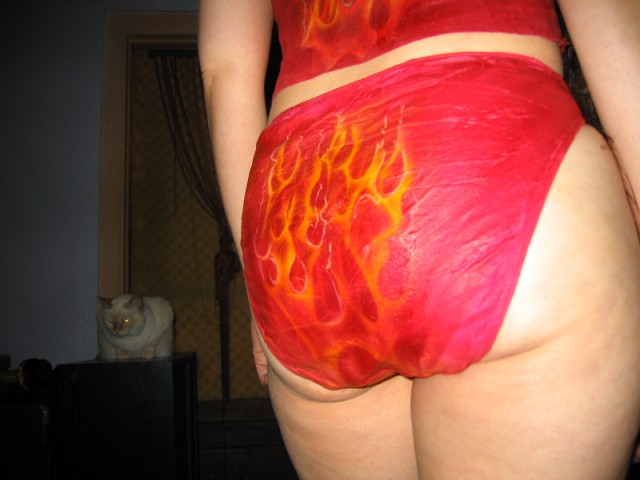
Notice the Saran Wrap under the bikini? Can you imagine trying to pull those things off when the latex has soaked through and bonded to the skin? Yeah, use Saran Wrap. And WAIT UNTIL IT'S CURED! |
||||||||||||||||||||||||||||||
|
|
||||||||||||||||||||||||||||||
|
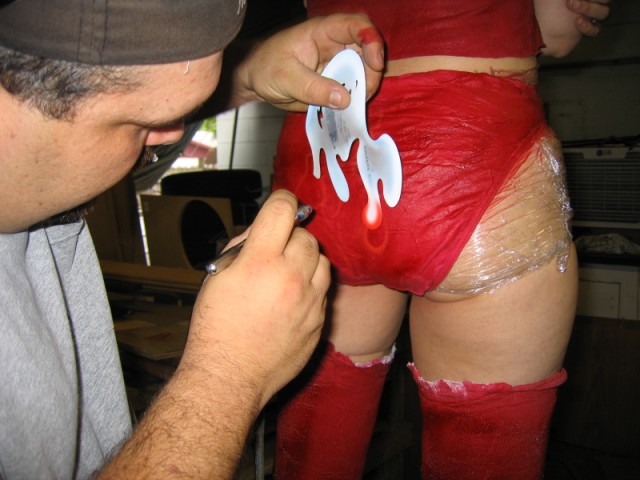
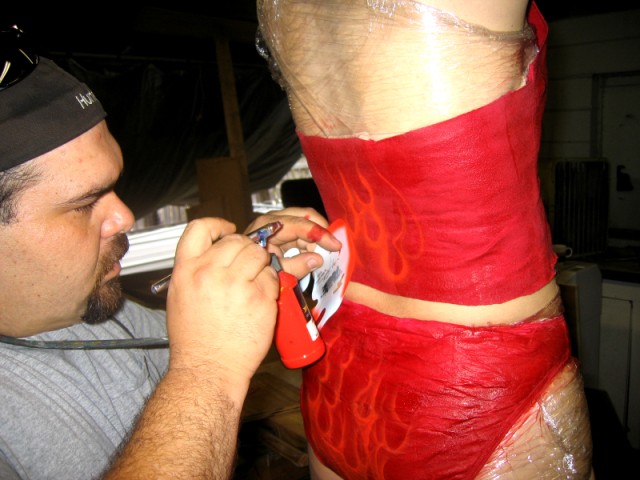
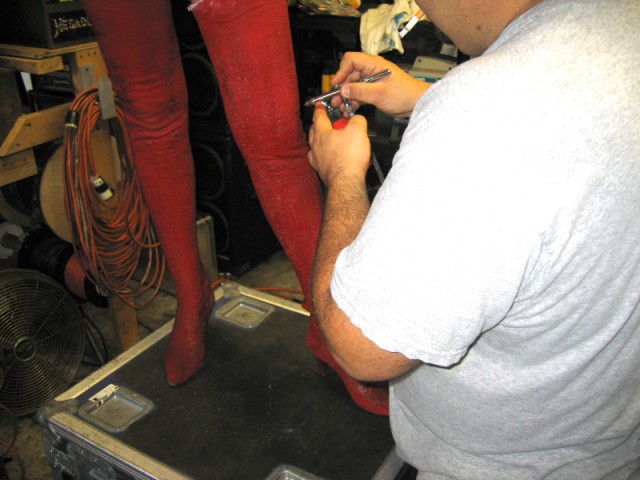
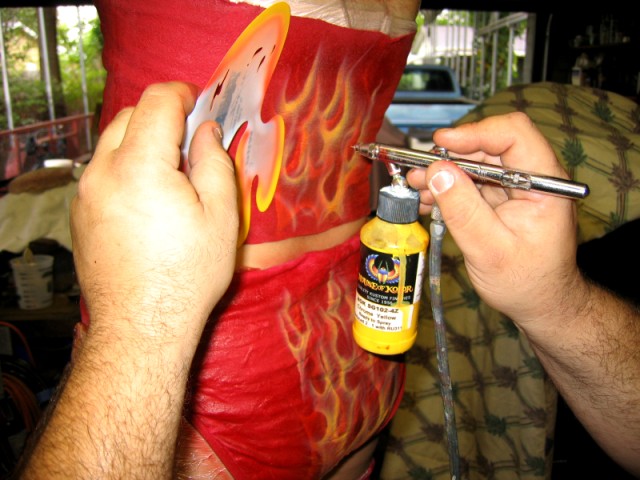
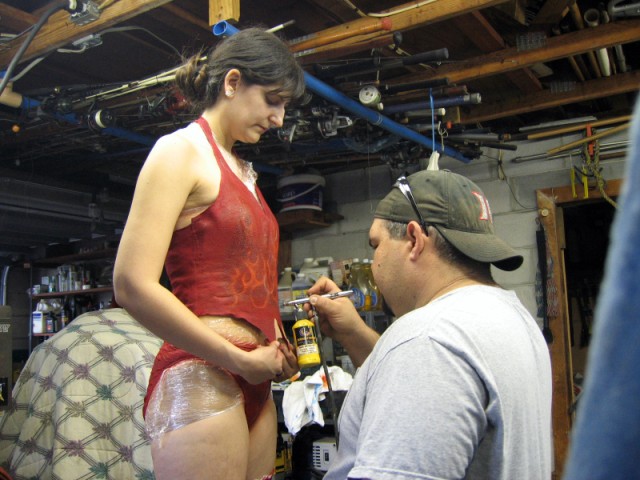
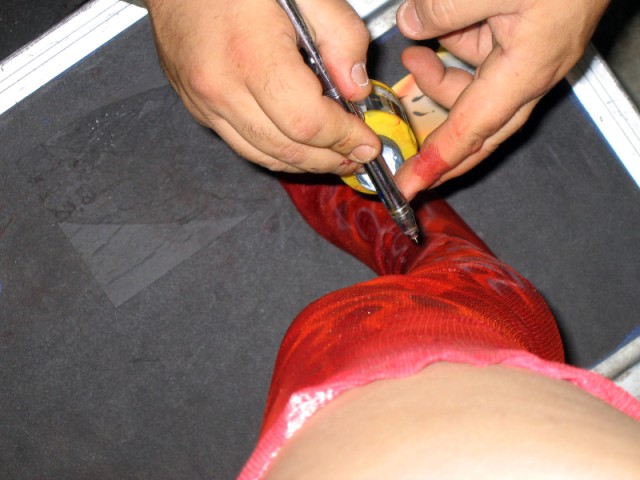
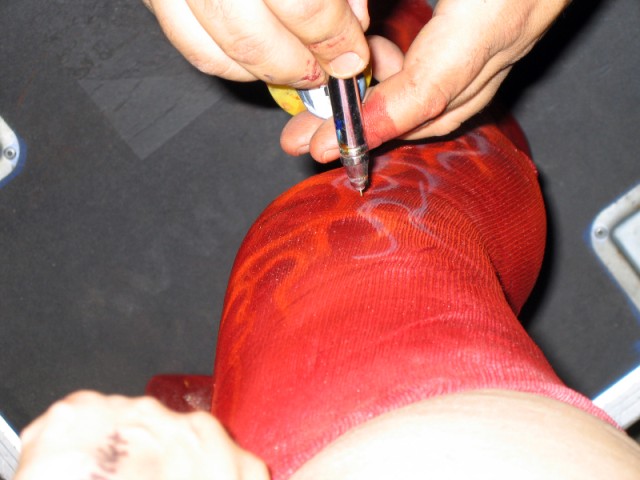
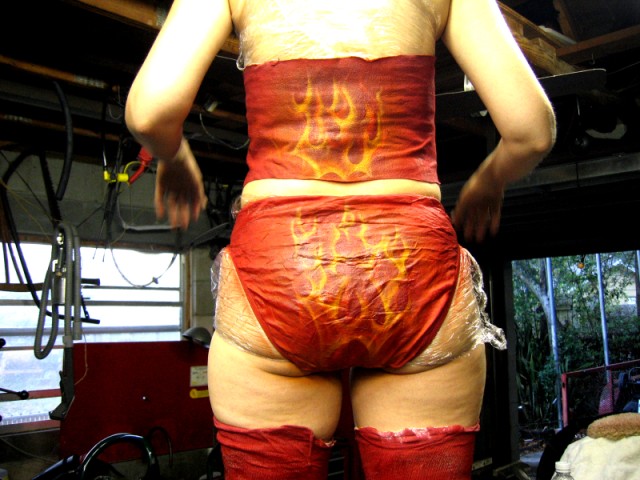
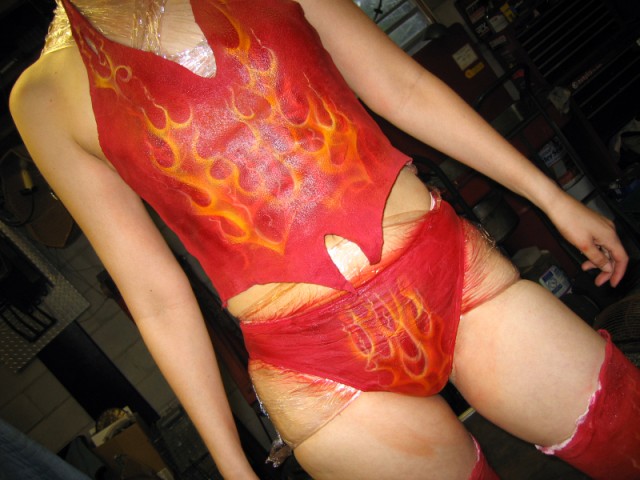
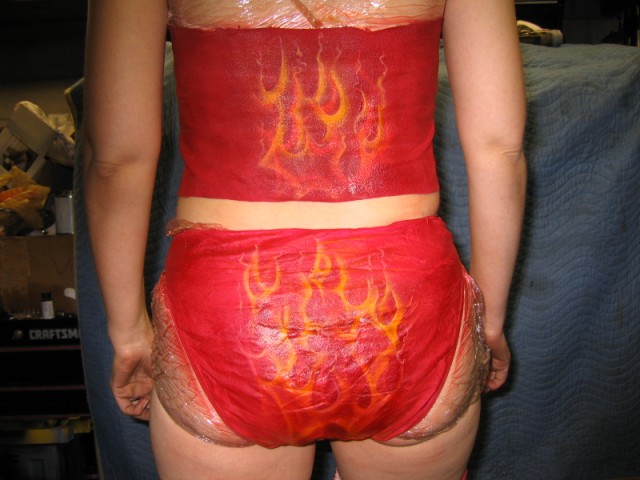
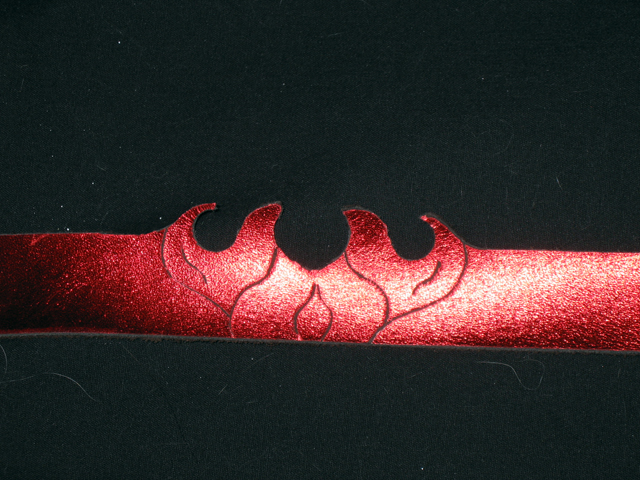
Now comes the airbrushing! You can see from the concept drawings that the outfit is supposed to have flame designs. So I called up my buddy, Emilio, who does airbrushing on vehicles and had him airbrush True Flames all over the latex. I requested that the flames sort of creep up the front of the halter top and that the flames do not completely take over the latex, but otherwise I left the details up to him. Here's the whole process done one rainy afternoon in his buddy's garage: |
||||||||||||||||||||||||||||||
|
|
||||||||||||||||||||||||||||||
|
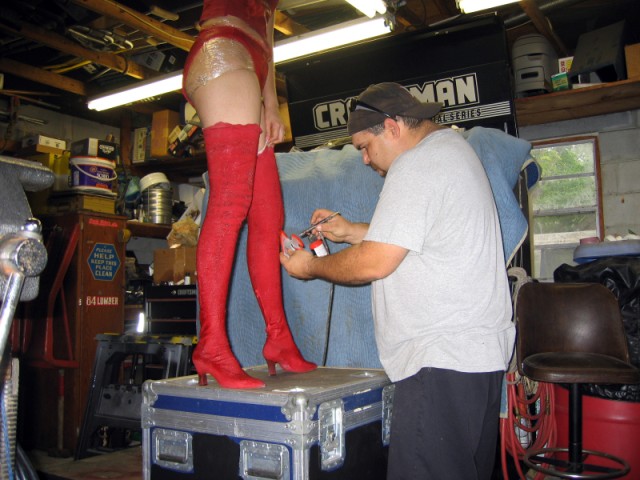
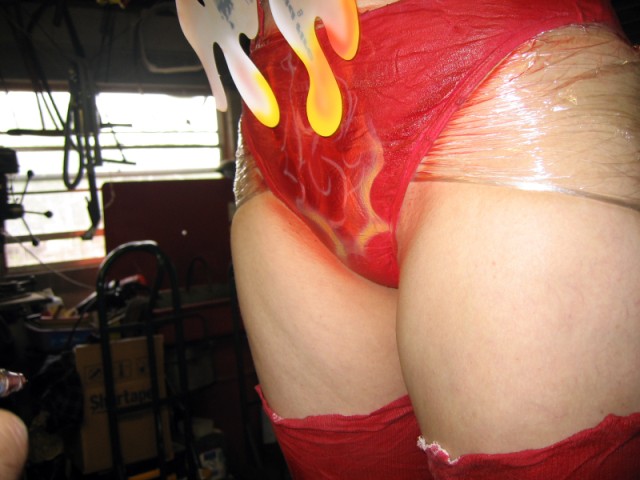
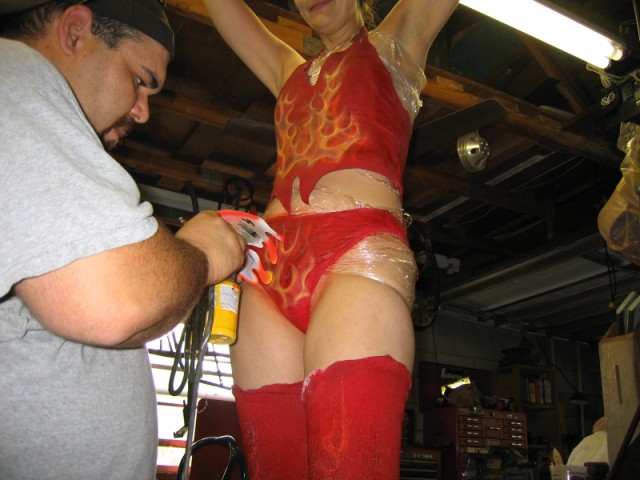
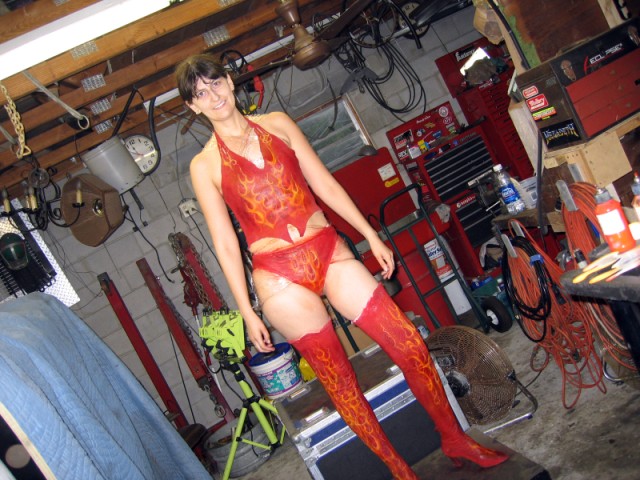
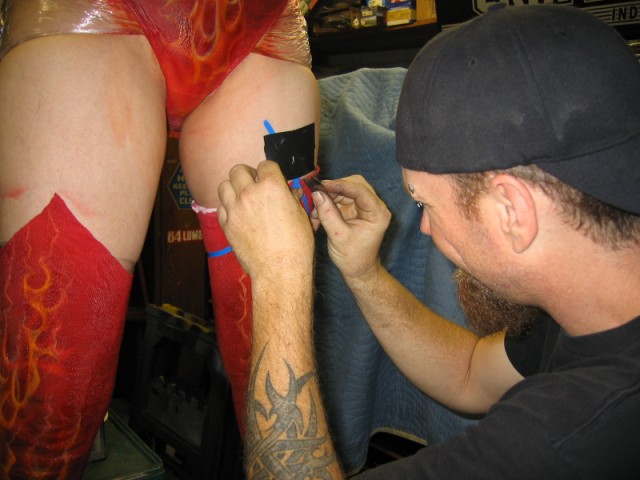
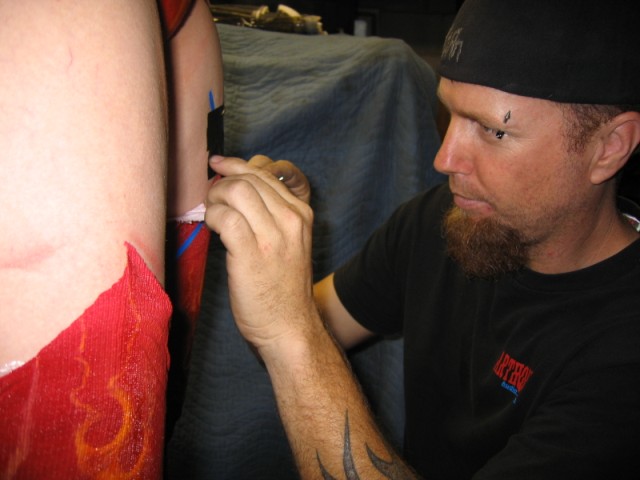
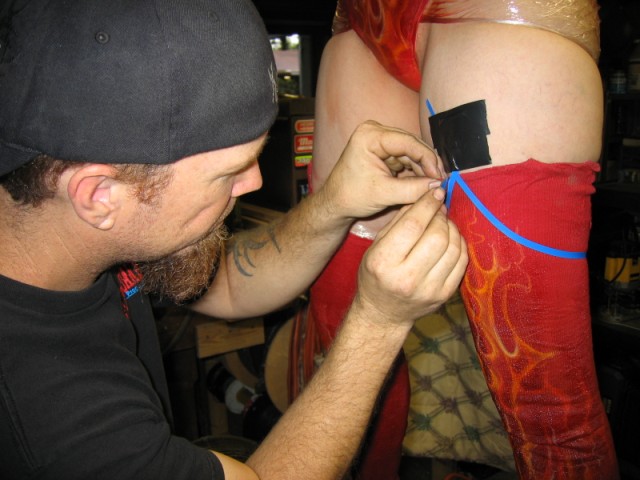
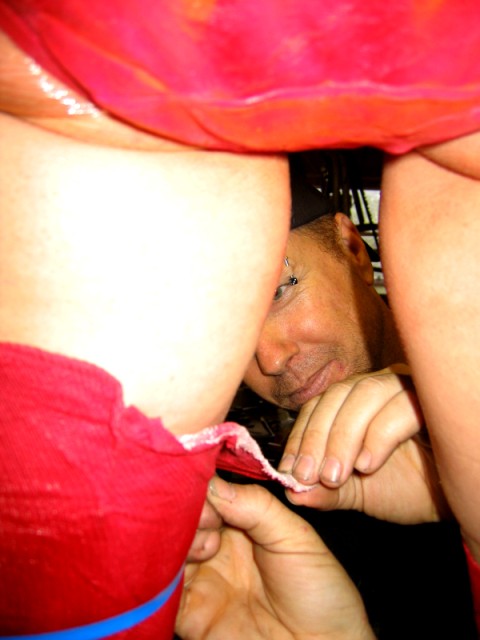
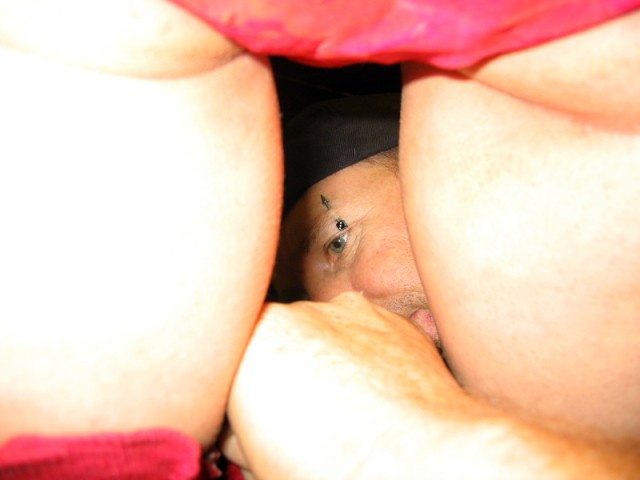
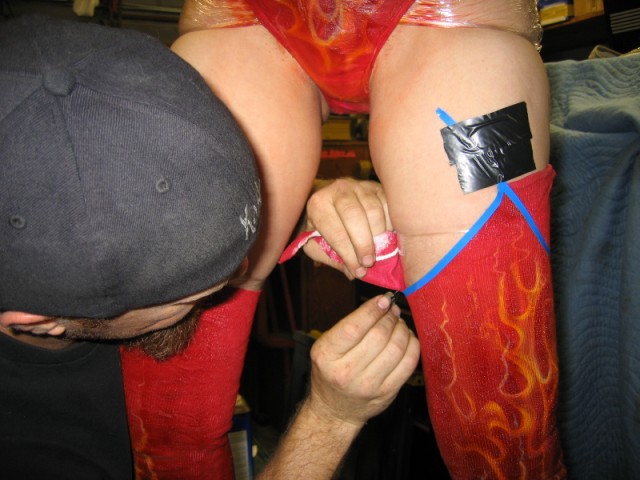
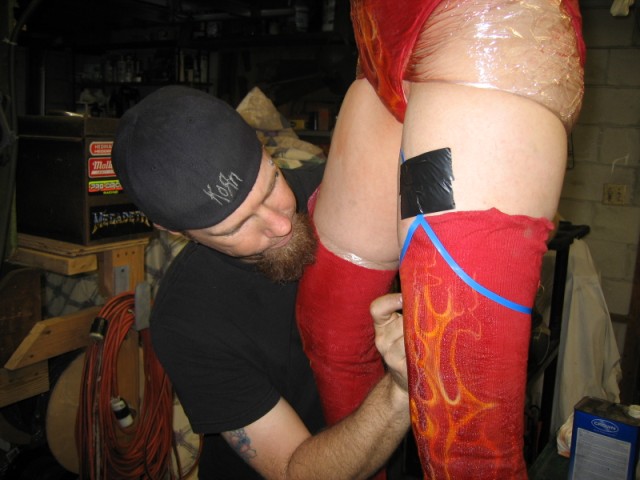
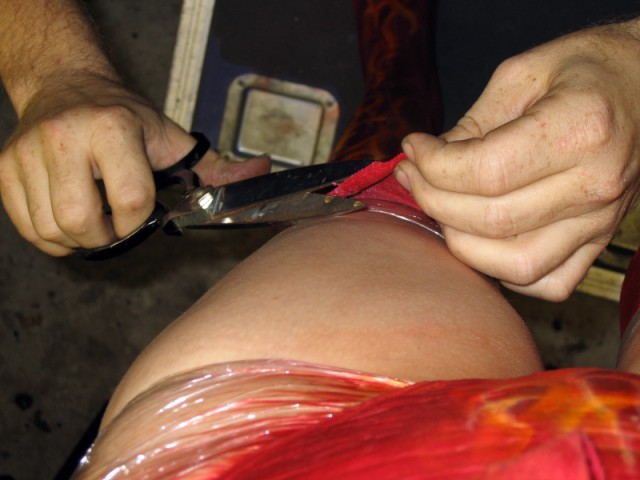
Now that the design work was done, I could cut the boot tops to the point in the front that I had on the concept drawings. Jason, whose garage and compresser we were using, and who was taking most of the pictures, taped the edge that he would be cutting, and using a razor blade, he cut the boots while I was still wearing them. Be very careful who you trust this job to! I needed to have them cut while wearing them to ensure they were cut evenly. Luckily, Jason has done very high-end auto A/V work, as he says "when you cut into the leather headrest of a client's BMW, you only get one chance to do it right. Otherwise you're paying for a new BMW seat out of your own pocket!" Emilio got cute and took pictures of Jason from between my legs. |
||||||||||||||||||||||||||||||
|
|
||||||||||||||||||||||||||||||
|
|
||||||||||||||||||||||||||||||
|
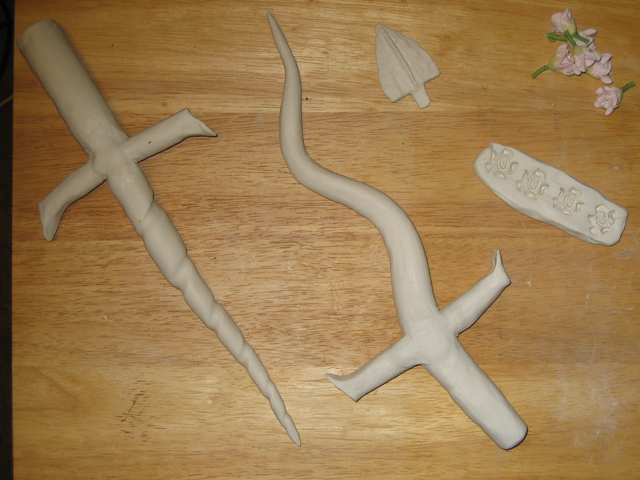
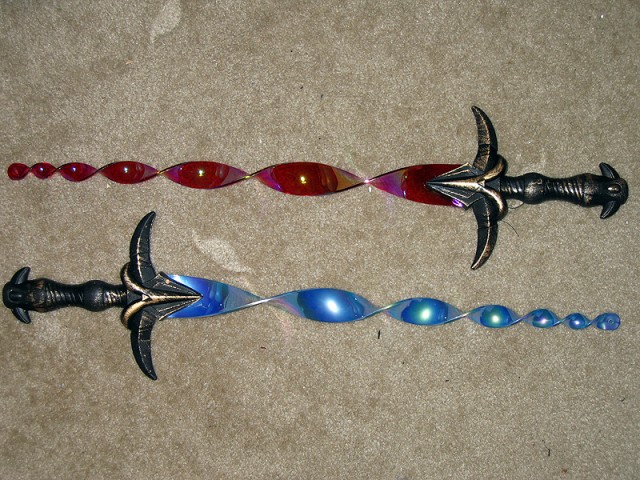
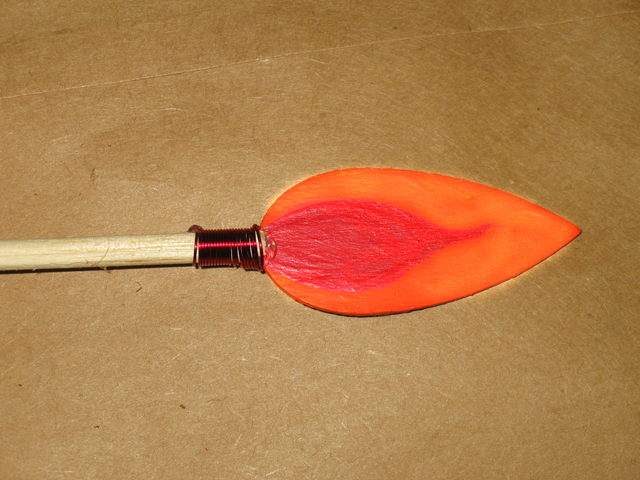
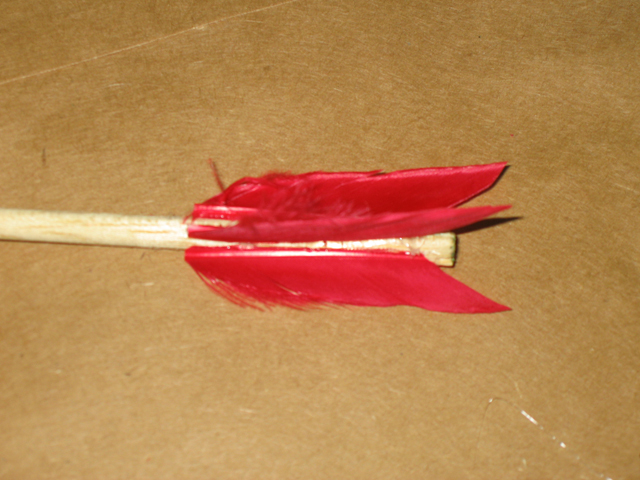
I'm sure I just didn't use the right materials, so I'll eventually try this again. But for now I'll have to use the daggers I already own, which do not quite match the costume. I also built a black "leather" quiver for arrows with flames along the bottom edge ... and I came up with the coolest swords! |
||||||||||||||||||||||||||||||
|
|
||||||||||||||||||||||||||||||
|
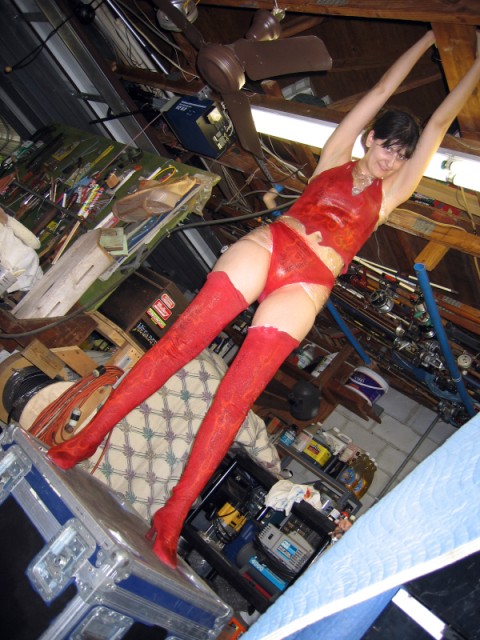
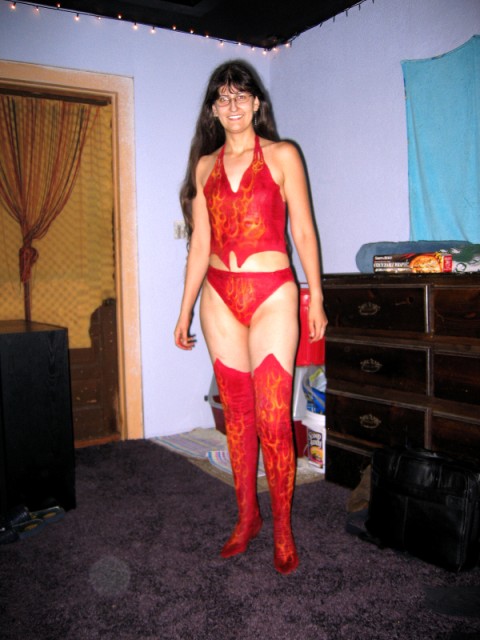
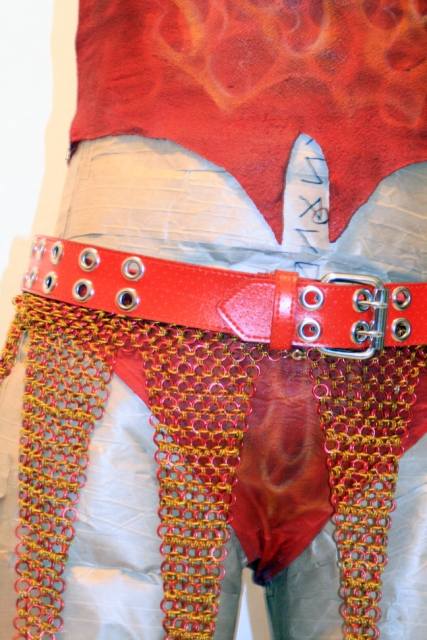
Now, for the finishing touches. I attached the sparkly-fishnet to a wide strip of elastic and cut it into flame-like strips that now hang down and flutter around my thighs as I move. I also added a custom leather thigh-holster for a knife sheath. I came up with the basic design, and my sweetie Ki, a leather worker who makes period armor, BDSM toys, and other things, added a few conveniences that I hadn't thought of. It's designed to be interchangeable with any belt and any knife-sheath. This attaches to the red leather belt and straps around my right thigh, while the sword sets on my left for a right-hand cross draw.
Oh, and let's not forget the flames makeup! For the first appearance (and one or two more after that), I just used standard stage makeup, the kind that comes in a waxy pencil that you can buy at any party store and a pair of latex elf ears that I found there at the first con where Fire Elf debuted.  
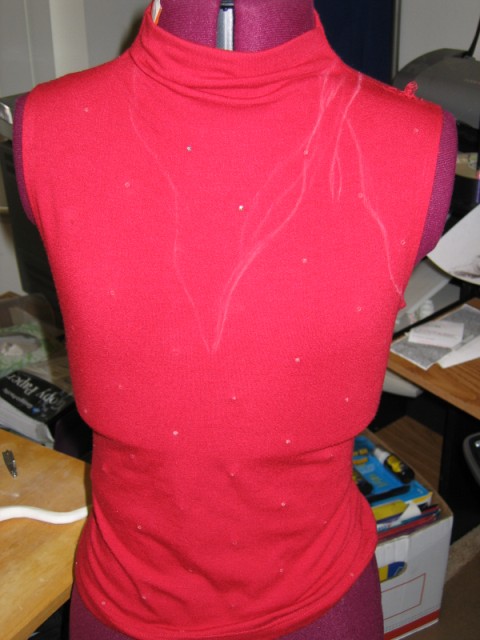
But about a year and a half after my debut, I decided that I suck at drawing flames and I wanted something more reliable. So I pulled out some old temporary tattoo paper I had lying about and designed a computer-generated image of flames that I could print on the paper and apply as a fake tattoo. This will ensure I have the exact same makeup every time and not look so much like a kid's rendition of fire. I also added theatrical contacts: 
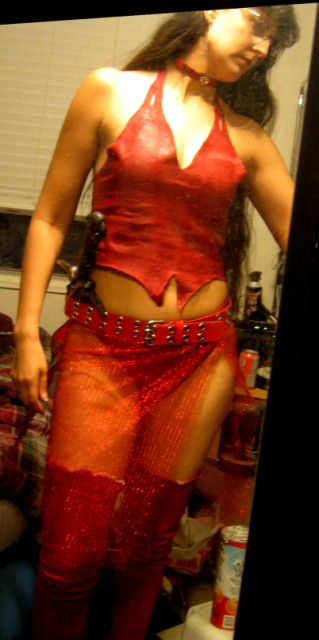
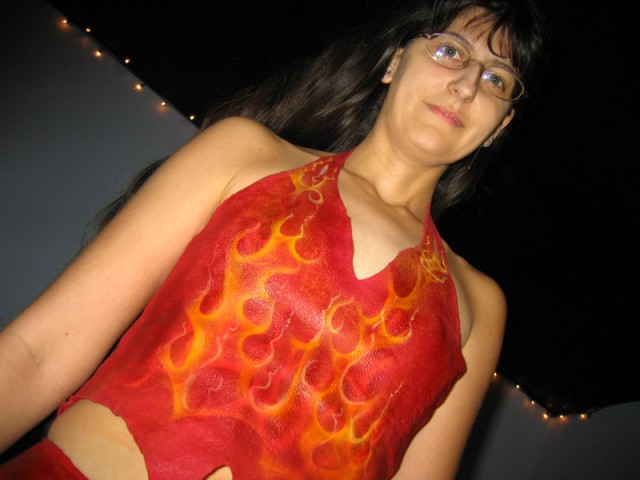
And now, Joreth, The Evil Fire Elf: |
||||||||||||||||||||||||||||||
  
See more pics at Baycon 2007, Dragoncon 2007 , Dragoncon 2008 and Dragoncon 2009! |
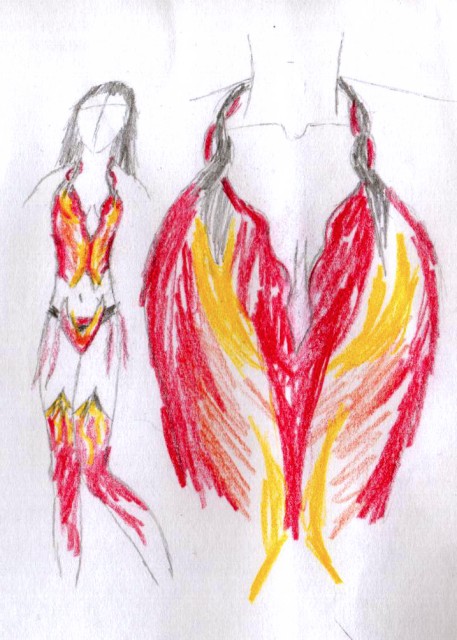


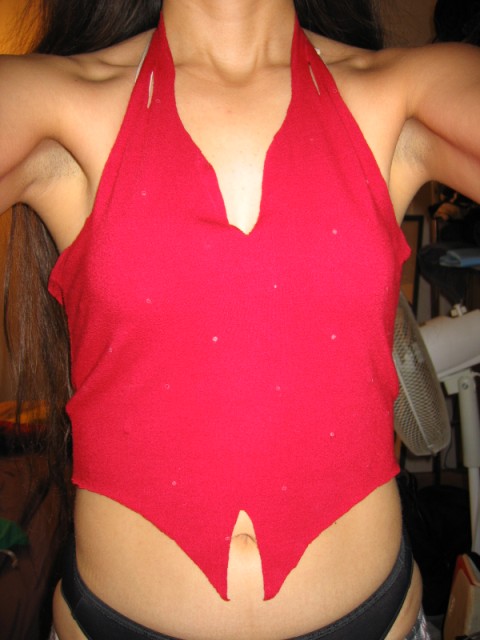

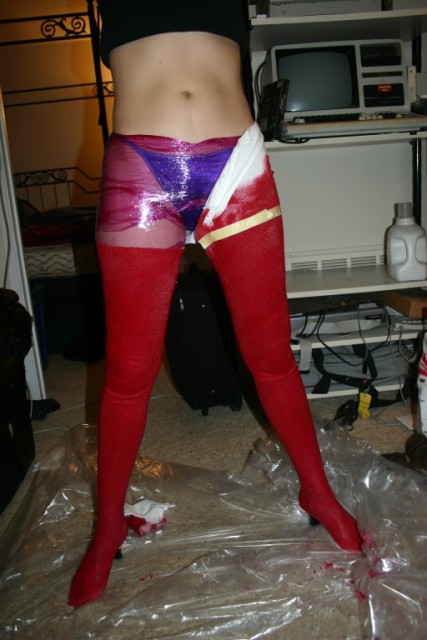
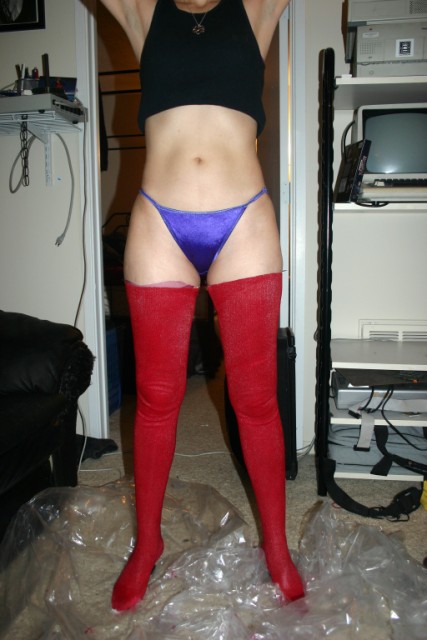
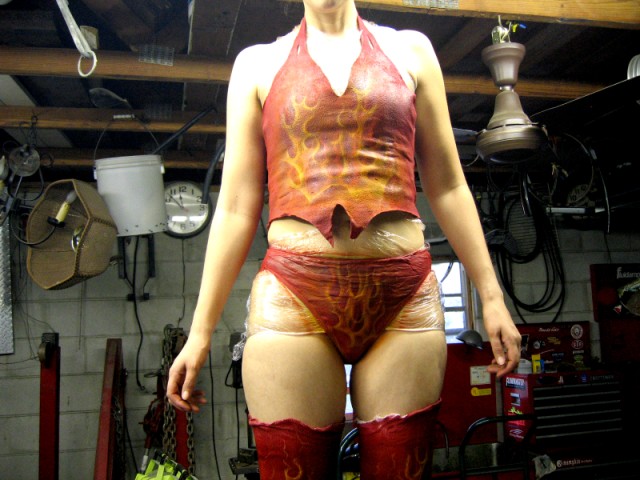
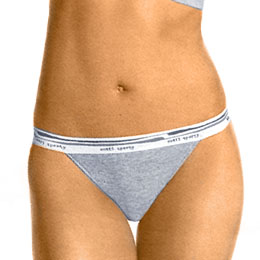 So, I have the halter-top cut in the shape I wanted, but what about the rest of the costume? My original idea for the bottoms was to take a pair of Hanes bikini briefs, y'know the kind that has an elastic waistband that is different from the rest of the panty? This would give me a natural division between what should have been the black side-straps and the flame front in my original concept drawing. Yeah, didn't work. I don't know if I had the wrong size or I'm the wrong body type, but they just didn't look right at all. So I scrapped that idea and went with another pair I had that was just a simple bikini bottom of all nylon.


The Inn Between © 2002