 |
 |
 |
 |


Installing the Ceiling
For the ceiling, I used a very thin insulation that resembles bubble wrap covered in tin foil. It's probably not as good as the original fiberglass insulation or the new foam insulations, but since the roof is already very low, I needed to keep the ceiling very thin. The insulated paint on the outside should also help keep it cool.
|
|
|
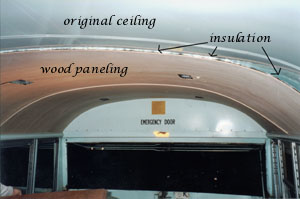
Here you can see the wood paneling, the original ceiling and the insulation between. Because the roof is not curved in a perfectly spherical shape (it's more like a flat roof with curved sides to meet the walls), and because of the nature of the wood paneling, there was some space between the paneling and the original ceiling, which is difficult to see in the picture. Although not quite as much air space as the directions recommend, it will still add to the efficiency of the insulation. |
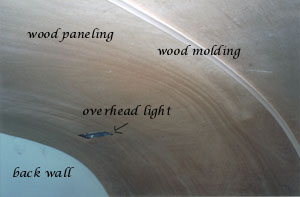
you can see where I added wood molding, to hide the seams between the wood panels. Because the wood tends to curve more in a spherical motion, when forced to fit with the original ceiling, the panels don't always match up exactly, causing cracks and spaces between the panels. By closing the seams with the molding, not only do I get an attractive pattern on the ceiling, I also close these spaces, making a more aesthetically pleasing and effective heat-blocking surface. You can also see one of the cut-outs for the original dome lights, which I will keep and re-cover with custom light covers. |
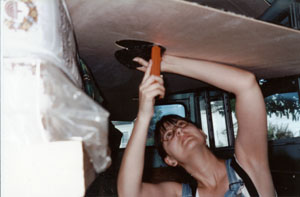
Here I am cutting out one of the vent holes. First I used a jigsaw to cut the
shape out of the wood, then applied the insulation to the back side and cut
the hole with an exacto-knife. This same process was applied to the dome lights.
|
|
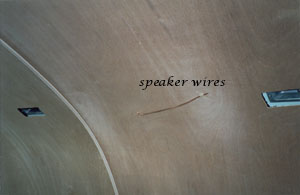
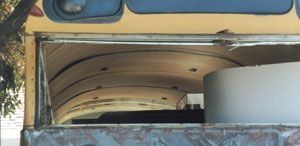
| Here you can see the molding and 2 dome lights as well as the new speaker wires. Eventually, Scott will install a new stereo system in the bus. There will be 6 speakers: 2 on each side of the dash, 2 on each side in the front of the passenger section, and 2 on each side at the back of the passenger section (the middle of the bus). Right now, the wires are simply taped to the original ceiling and pulled through a hole drilled in the approximate spot where the speakers will be attached. | Looking through the back window of the bus, you can see the ceiling mostly installed. It feels much more like a home now, with the new paneling. Before, when the dome lights were on, it used to feel like a prison bus, with it's harsh, blueish-green walls and green seats. Now, with the wood paneling, the dome lights reflect off the warm wood and give it a cozy, homey feeling. I'll try to get a picture of it at night with the domes on. |
The Inn Between © 2002